
Taking the Plunge to Saltwater
by Steve Matassa
I am sure many of you fresh water hobbyist have thought of getting into salt water, but are afraid of the challenge or even the expense. Well, it’s not as hard as you might think or as expensive, although, it is a little more expensive then fresh water, but it’s definitely worth it. If you have kept fresh water fish successfully, you can keep salt water fish. All you need is a little knowledge, before taking the plunge. I will try to walk you through this as simple as possible, and as cheap as possible. The cheap part probably caught your attention, right – then let’s give it a shot.
First you need a tank,(Amazon Affiliate Link) try to go with the biggest your budget and space can handle. The bigger the tank the more stable the water parameters will stay. I know it might not seem like it, but the larger the body of water, the easy it is to maintain parameters like temperature, pH, ammonia, nitrate, etc. as they will fluctuate less in a larger tank than a smaller one. If something does go wrong like a bad heater, a dead fish or any other issue you will have more time to correct the problem. For example the temperature will fall less in a larger tank then a smaller one if the heater fails in a given time. The same hold true for other water parameters. The difference in time could mean you catching the problem in time or losing your fish.
I would say at least a 30 to 40 gallon aquarium would be a good tank to start out with, larger if you can. Ok so you have your tank, and a strong stand to place it on. Don’t under estimate the stand, or the floor below, remember by the time you are finished between the water, tank, stand, and what’s inside you could be in the range of 9 to 10 pound per gallon. It is important to level the stand first. Leveling a stand is sometimes overlooked, and definitely should never be overlooked. Stands that are not level will put uneven pressure on the tanks seams, and on the stand which can cause tanks to leak, or even worse – break. Even a 10 gallon tank is a lot of water to have on your floor, imagine a 40 gallon. One of the things I do is to place ½ inch Styrofoam between the stand and the tank. This might not seem logical, but the Styrofoam will take up any slight imperfections in the stand to avoid those leaks. I use this method on any tank over 30 gallons and have had great success with this method.
Location is also important. Never locate the tank in front of a window, or in direct sunlight, unless you like the look of green water.
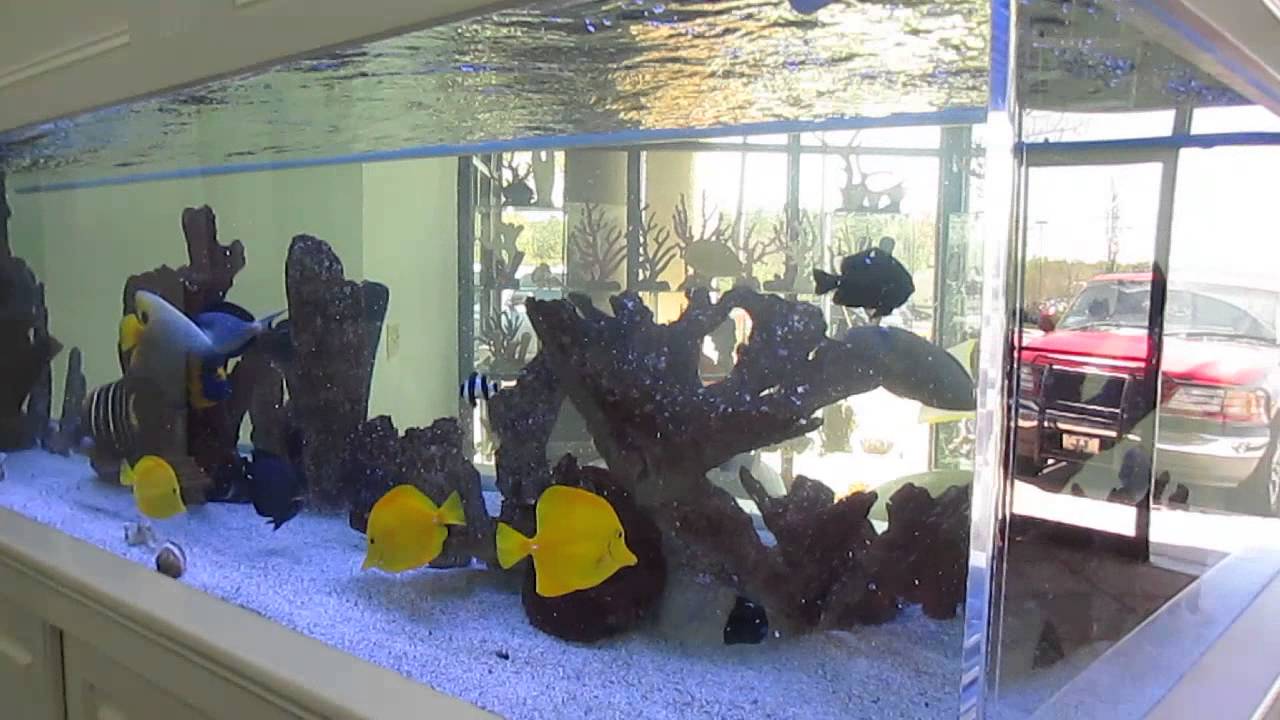
The next thing is lighting. If your setting up a fish only tank with base rock or coral skeletons, you don’t need much light. A fluorescent strip light is fine. The same type of lighting you use for your fresh water is fine. If you are using live rock then you will need more light, but we will stick to the easy and cheaper setup for now, so a fluorescent light is fine. Make sure to use the right lamps (florescent bulbs?), not a fluorescent lamp (bulb?) from your house fixture, or basement. I like to use a 10,000k lamp (bulb?) as it has a nice bright white color for my salt tanks, but this a matter or taste. There are other choices, as long as they are aquarium lamps (bulbs?)[any brands or special types – as some are for plants, some are for more blue, etc.]. Using the wrong lamps(bulbs?) can promote algae blooms, so make sure to purchase the proper lamps(bulbs?). The proper lamp(bulbs?) will also show off your fish true colors. Replace the lamps(bulbs?) about every 12-18 months, even though they are still working they are not producing the proper spectrum, and that can promote algae blooms.
Next is filtration. In my opinion wet/dry’s or refugiums are the best, but are not mandatory. Good canister filters work well, or even a hang-on power filter. When buying a filter, purchase one that is rated for a little bigger then what you need. I find that most manufactures tend to overrate their filters.
The filtration does not stop there; a protein skimmer is probably the most important piece of equipment in your salt water tank. This is where you shouldn’t skimp on cost. Forget about those 29 dollars specials, because they don’t work well, and you will be constantly adjusting or cleaning them. I have tried that route and went through several, it will end up costing you more in the long run. When they say you get what you pay for, they were talking about skimmers. I don’t want to say you have to have a skimmer, but it will clean your water better then any kind of filter can. It will remove dissolved solids, the other filter media can not. I will never recommend setting up a salt water tank without one. When you see the muck that a good skimmer collects from your tank you will understand why most hobbyists consider it to be the most important piece of equipment in the tank. It is not a substitute for water changes, but without it you will be doing a lot more water changes.
A good submersible heater is next about 3-5 watts per gallon is needed. This depends on the location of the tank, how well the room is heated. It is a good practice to use two smaller heaters instead of one larger one. The chance of two going bad at the same time are very unlikely.
You will also need a good quality salt mix and a hydrometer. For those of you who don’t know, a hydrometer is a tool used to measure the amount of salt you have to put in your tank. It measures salt by the specific gravity, or salinity. In a fish only tank I like to keep my salinity at 1.019- 1.021, where in a reef I would keep it at 1.024-1.026. We will get into mixing the salt later on.
Substrate is another thing to consider. The substrate used in salt water is different then fresh, as it must help to maintain the pH at around 8.3. You can use sand, crushed coral, dolomite or even live sand. In my opinion live sand is the way to go, but it is more expensive. If you are looking to save money you don’t have to use all live sand; you can mix it with regular sand. A bag or two of live sand will help speed up the cycle.
Cycling a salt water tank used to mean waiting about 6-12 weeks, lucky there are ways to speed that up now. One of the ways is live sand and/or live rock. Another method is a friend can give you a start by letting you take a couple of cups of his sand, and some filter media from an established tank, obviously this is cheaper then buying live sand. Using a bag of live sand, or a starter kit from a fellow hobbyist will cut the cycle time down dramatically. Using the live sand method it should take less then a week. I have cycled a tank in as little as 4 days this way. While the tank is cycling you will need to monitor the water perimeters with a test kit. A quality salt water test kit is another piece to this puzzle. It must test for high pH, ammonia, nitrite, and nitrate. These are the tests you will be performing every few days while the tank is going through its cycle. There are many reputable manufactures out there that have reasonable priced kits.
For those of you who don’t know I will try to explain what it means to cycle a tank. When you first fill your tank with fresh water, your ammonia nitrite and nitrates are undetectable, but with the addition of live stock this will soon change. You will start to build up beneficial bacteria which is a good thing. These levels will start to rise, even to the point of maybe killing off your starter fish. For this reason you should buy inexpensive hardy fish like damsels. Once the tank has finished its cycle you can remove the damsels if you don’t want to keep them, and put in what fish you want. More delicate fish probably won’t make it through the cycle, so you will be wasting your money. You will monitor the tank levels with the test kit every few days at first. The levels will rise, and then fall back down. When they come down your cycle is over, and you can start to add more fish, but slowly. Your ammonia, and nitrite should always be at 0, but it is normal to have some nitrates present. Most fish only tanks will have a nitrate level between 20ppm and 50 ppm, and this is fine. Of course the lower the better, but this is a good indicator for water changes, so keep and eye on them.
When adding more fish you may see some rise in these levels, like a mini cycle. This is nothing to be alarmed about, it’s normal. If it rises too much, doing a water change will bring them down. The more you stock the tank the harder it will be to keep your nitrates down, so not resisting that one more cute fish might just be the breaking point. So don’t overstock your tank. Adding fish one or two at a time is a good practice, so be patient. It will be worth the wait.
Once you go through your cycle you can hook up your protein skimmer. It might take a week or two for it to start skimming properly. If a skimmer is working properly the collection cup should be filling with dark color waste. If it is filling with clear or light color liquid it needs to be adjusted.
We now have all the pieces to the puzzle, so we can start putting them together. We can begin with water. You have a couple of choices here. One is you can use tap water, two is deionization water, and the three is reverse osmosis water. Listed in order of the cheapest first we will go with tap water since we are not using live rock here. If you were using live rock you should use either deionization or reverse osmosis water instead. If you can, I recommend buying either a deionization filter or reverse osmosis filter, because will lesson the chances of algae blooms.
First pick your spot, level your stand, and place the tank on top. Prepare the substrate by rinsing it, and placing it in the tank (do not rinse live sand or it will not be live sand anymore). Set up the tank the way you want, and fill your tank a couple inches short of the rim, (to leave room for the salt) hook up your filter. If you are using live sand, or live rock you will have to add it after the water is mixed, and oxygenated. Do not add it to fresh water or you will kill it off. Check for leaks, and start up the filter. Do not place any of the media from an established tank in the filter as there is no salt in the tank yet. Hook up the heater, and let it aerate for 24 hours. The next day you can put the salt in, and adjust using your hydrometer. Keep in mind the temperature affect the hydrometer readings so adjust your temperature first. I try to maintain the temperature around 76 degrees Fahrenheit, but a few degrees either way is not crucial. I don’t use the skimmer until the tank finishes its cycle as it will only slow the cycle down.
One of the biggest differences in salt water to fresh is your water changes. In fresh adjust the pH, temperature, dechlorinate and your ready. With salt you have to adjust the salinity also. We do that by mixing the salt and water in a bucket, never in your tank, once it’s started. The water must be the same salinity as your tank before adding it to the tank. I find a good way to mix the salt is with a power head in a bucket. It takes about 15 minutes to fully dissolve; if the salt is not fully dissolved you can not get a true reading. Another thing to keep in mind is top off water. When water evaporates the salt does not, so you add fresh dechlorinated water only to top off evaporation, just adjust the pH and temperature.
After your tank has been aerating for 24 hours we can add the salt. It is always better to add too little salt then too much salt. If you are too low you add more salt if you are too high you have to drain some water and add fresh water to bring it down. Adjust using your hydrometer, and we are ready for the next step.
The live sand or starter culture from a friend’s tank goes in next. You might want to shut the filter off for a couple of minutes, so the sand can settle. Filter for awhile and you’re ready.
See, not as hard as you thought! Now our next step is the fun part going to the fish store to buy fish. Now remember think hardy and cheap for your starter fish. I know the selection can sometime be confusing. It is always good practice to do a little research first. Find out what fish are compatible, and also hardy. Saltwater fish are more expensive then fresh, so choose carefully.
I find it a good practice to always ask the pet store to feed the fish before buying them, to make sure they are eating. Never buy fish that refuse to eat because they may never start. This of course will only mean a slow demise. Any good pet store will have no problem feeding the fish for you, if they do you are in the wrong store. Good luck, and enjoy. See you at the next auction.
Steven Matassa